Removing the Outer Shell of Quick Mill Home Espresso Machines
Removing the outer shell, or panels, from your Quick Mill home espresso machine, is an incredibly easy process. Once your side panels on your espresso machine are off it makes repair and servicing your machine much easier. The room to work will be extremely welcome when making more complicated repairs.
The six easy steps to remove the panels on your Quick Mill will vary based on the machine but will definitely get the job done! They are applicable towards but not limited to the: Quick Mill Vetrano 2B Evo, QM67, Andreja Premium Evo, Anita Evo, etc.
Step 1: Remove Back Panel
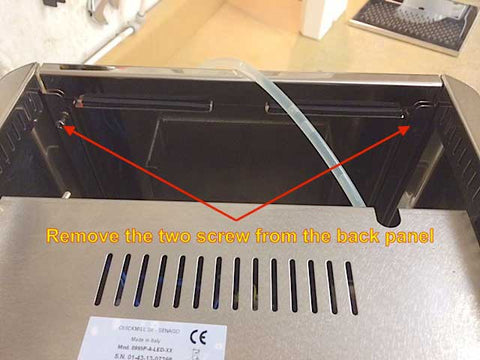
Remove the water reservoir. After removing the water reservoir from your machine, remove the two screws from the back panel from inside the machine nearest to the frame closest to where the cup tray was.
Step 2: Remove the top panel.
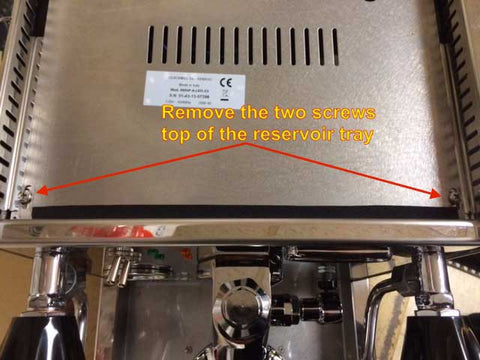
After you have removed the rear panel, the reservoir tray (top panel), needs to be removed. Remove the two screws from the top of the reservoir tray.
Step 3: Remove the Reservoir Tray
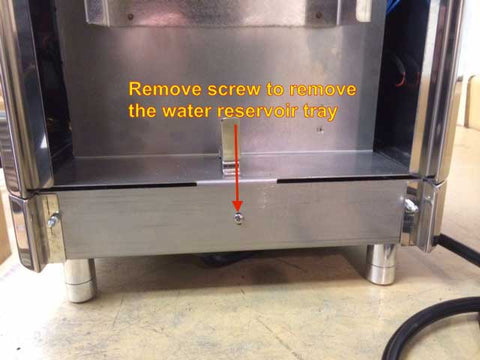
Remove the screw in the center of the tray that the reservoir usually sits.
Step 4: Remove the lower trim.
Remove your drip tray and set it aside. Once the drip tray has been removed the screws on the inner front side are revealed. Remove the screw from the sidewall under the drip tray on either side or just the side of the machine you'd like to expose.
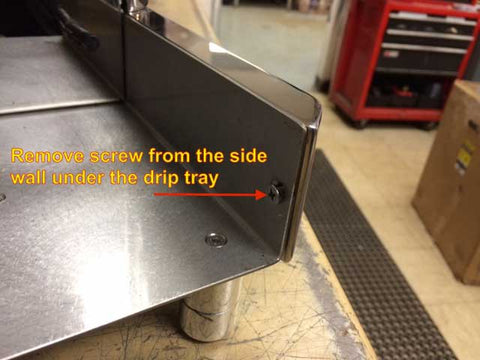
Step 5: Remove rear panel locking pins.
Back to the rear panel, unscrew the locking pins to release the side panels. These are the pins that your rear panel snaps into.
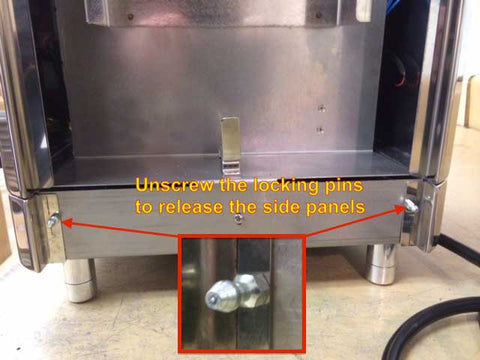
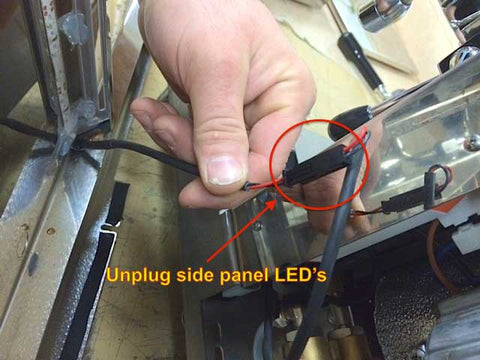
Step 6: Unplug Vetrano 2B LED Lights
Unplug the side panel LEDs prior to completely removing the side panels on your Quick Mill Vetrano 2B Evo.
